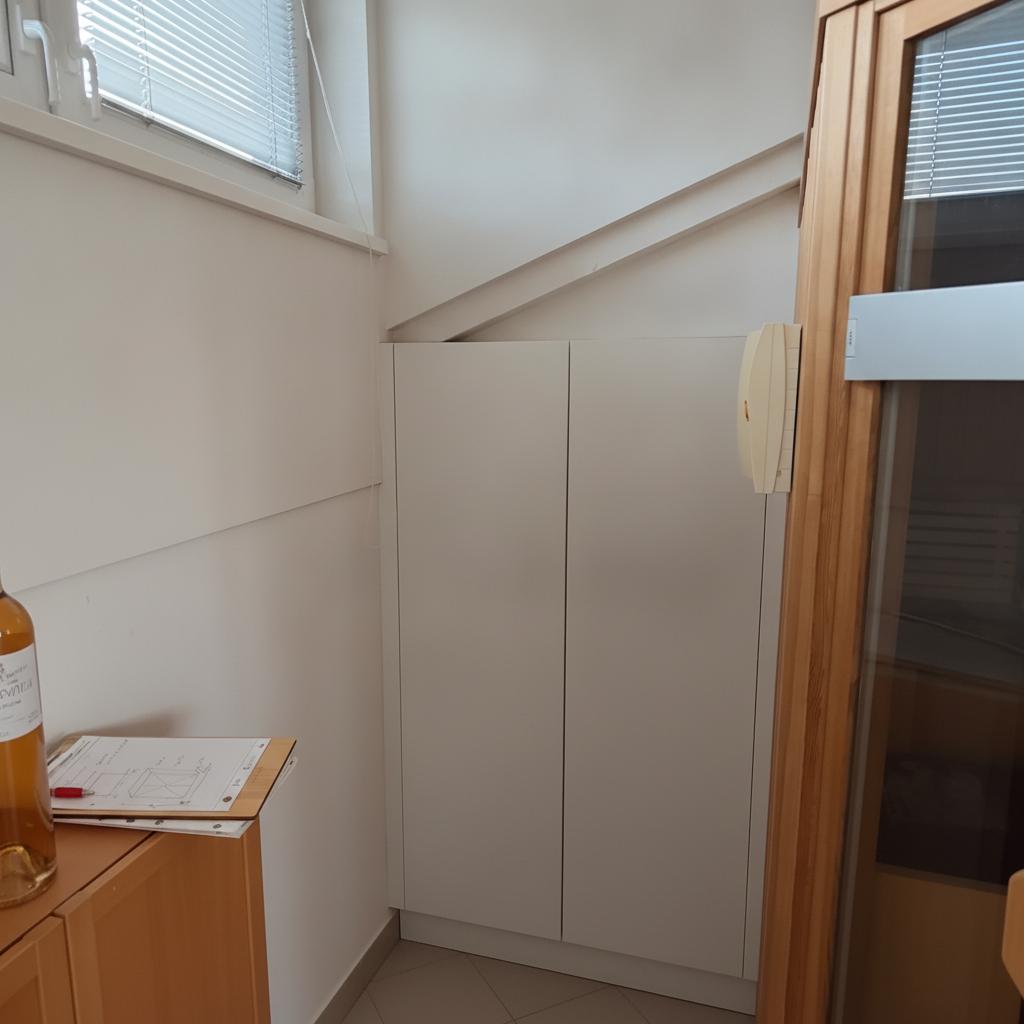
Image 1 is the base photo of a small storage niche. Image 2 is a hand-drawn front elevation sketch of the cabinet to install. Edit image 1: remove all clutter from the niche (round table, chairs, bags, cooler box, boxes, mat, hammock chair) and show the empty niche with the same tiled floor. Keep everything else unchanged: white walls, the window with blinds, the sloped ceiling edge, the wooden sauna on the right, the wooden cabinet on the left foreground, lighting, perspective and camera angle. Place a built-in cabinet into the niche, following the sketch: - Total width 101 cm, total height 188 cm. The top edge of the cabinet ends level with the window sill. - Exactly two flat doors of equal width (about 43.5 cm each) with a thin vertical gap in the middle. The doors are hinged, with no handles, no knobs and no visible hardware. Do not draw an X or diagonal lines. - Narrow filler panel on the left (4 cm) and a wider one on the right (10 cm), both flush with the door fronts, no offset. - A recessed plinth, 10 cm high, at the bottom across the full width. - Matte white lacquer finish on all parts, handleless, even narrow joints, tight fit to walls and ceiling line. Photorealistic, matching the existing daylight, soft shadows and color tone.
@hanzi
Prompt
Image 1 is the base photo of a small storage niche. Image 2 is a hand-drawn front elevation sketch of the cabinet to install. Edit image 1: remove all clutter from the niche (round table, chairs, bags, cooler box, boxes, mat, hammock chair) and show the empty niche with the same tiled floor. Keep everything else unchanged: white walls, the window with blinds, the sloped ceiling edge, the wooden sauna on the right, the wooden cabinet on the left foreground, lighting, perspective and camera angle. Place a built-in cabinet into the niche, following the sketch: - Total width 101 cm, total height 188 cm. The top edge of the cabinet ends level with the window sill. - Exactly two flat doors of equal width (about 43.5 cm each) with a thin vertical gap in the middle. The doors are hinged, with no handles, no knobs and no visible hardware. Do not draw an X or diagonal lines. - Narrow filler panel on the left (4 cm) and a wider one on the right (10 cm), both flush with the door fronts, no offset. - A recessed plinth, 10 cm high, at the bottom across the full width. - Matte white lacquer finish on all parts, handleless, even narrow joints, tight fit to walls and ceiling line. Photorealistic, matching the existing daylight, soft shadows and color tone.
Model
NANO-BANANA
Type
Image
Likes
0
Aspect Ratio
1/1